Saving and Using Templates
Saving and Using Templates
1. If you follow normal document-saving procedures (and you can here), you select File > Save As > Computer > Browse. Then navigate to the applicable folder and give the template a new name.
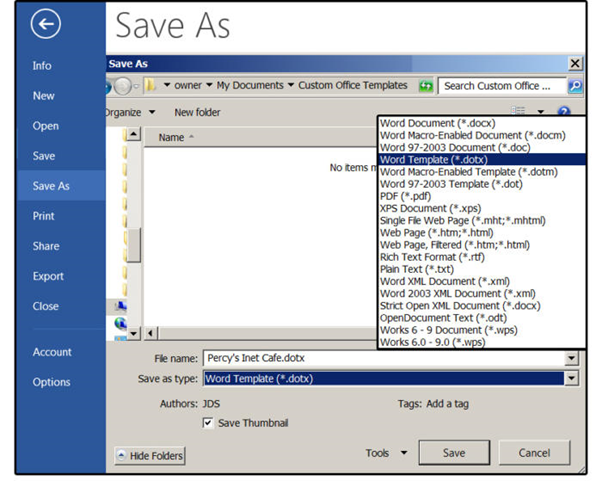
2. Remember that once you click the down arrow beside the Save As Type in the input box and select Word Template (*.dotx) from the list (and change the name, of course, in the File Name input box), Microsoft automatically puts the file in its own template folder.
3. Once saved as a template, close the file.
4. Now open it again. Note that it is not in the folder you specified. Don’t panic. Navigate to C:\Users\owner\Documents\Custom Office Templates and your custom templates are there. Select the one you just saved from the list and open it.
Save the document as a template.
5. Change the sections on the new template that will be on every project, such as the logo, or contact information. Then save it as a template again by pressing Ctrl+ S. It will save in the same location.
6. Next, fill in all the other information and save it—this time, as a document, so you can print it out or share it with others.
Whenever you’re ready to create a new project, just open the template, enter the new data, and save the completed project as a document.