Quick Answer
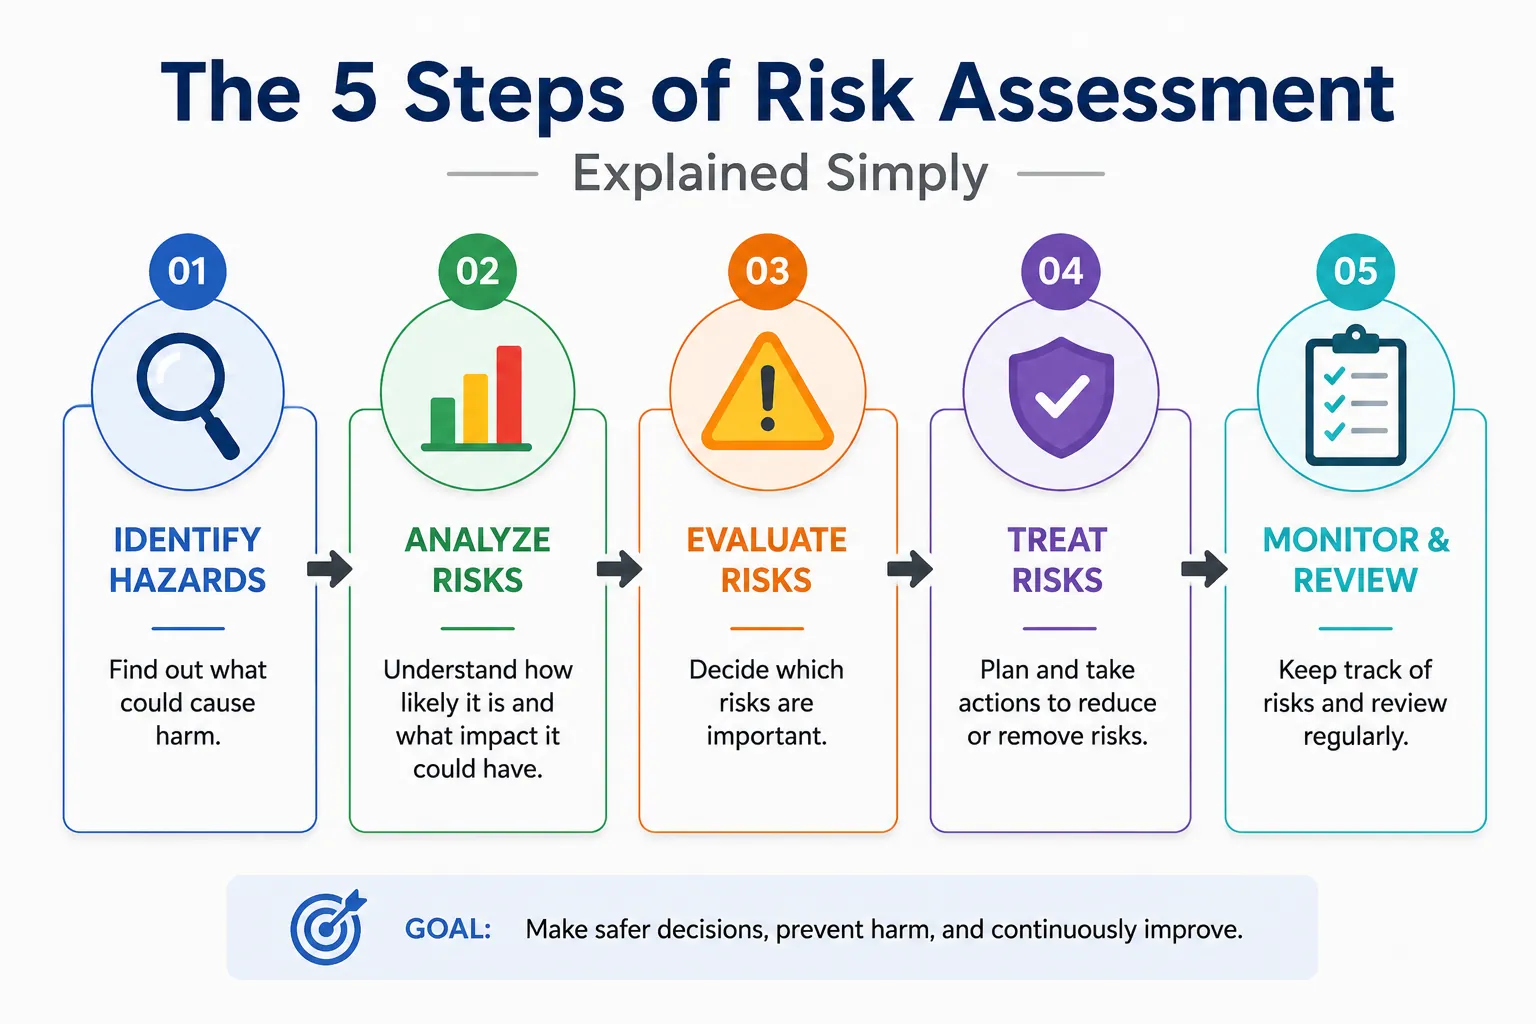
The five steps of risk assessment help you find hazards, figure out who could be hurt and how, evaluate the risks, decide how to control them, and then keep the process up to date. This method is simple and useful for making South African workplaces safer and meeting safety rules.
Many beginners worry about where to start with risk assessments or feel it’s too technical. Following this easy five-step process makes it manageable and practical, especially for workplaces in South Africa where safety laws expect risk assessments to be done properly.
Step 1: Identify the Hazards
The first task is to look closely at your workplace and pick out anything that might cause harm. Hazards aren’t just obvious things like machines or chemicals. They can be slippery floors, loud noise, poor lighting, or even work routines that might lead to injury or illness.
Walk around the site, watch how tasks are done, and talk to workers to get their input on dangers. Using simple checklists can help you not miss anything. This step is about casting a wide net to catch all possible risks.
Step 2: Decide Who Could Be Harmed and How
Once hazards are listed, think about who might get hurt and what kind of harm could happen. It’s not just employees—visitors, contractors, or anyone near the workplace can be at risk.
For example, if there’s a chemical spill hazard, it might mostly affect workers handling chemicals but could also impact cleaning staff or nearby visitors. Think through how exposure leads to injuries, like burns, breathing issues, cuts, or trips and falls.
Step 3: Evaluate and Control the Risks
Now, estimate how likely it is that harm could happen and how serious it would be. You can use a risk matrix which helps give a score to each hazard based on likelihood and severity.
Then, pick control measures that reduce risk as much as possible. The best way is to start by removing the hazard entirely if you can. If not, replace it with something safer, add barriers or safety devices, change work rules, and lastly provide protective gear like gloves or masks.
Step 4: Record Your Findings and Put Controls in Place
Write down what you found—the hazards, risks, and controls you will apply. Clear records mean everyone understands the safety plan and their role in it.
Then, make sure the controls are put into action quickly. Tell all affected people about new rules or procedures and train them if needed. Keeping good records also helps if safety inspectors visit.
Step 5: Review and Update Regularly
Risk assessment isn’t a one-time job. Check it regularly, especially if work changes, new equipment arrives, or there’s been an accident.
Set dates to review and update your risk assessment to catch new hazards or adjust controls. This keeps the workplace safe as conditions change.
Common Mistakes and Tips to Avoid Them
Some common missteps include rushing and missing hazards, underestimating risks, or not telling workers about changes. To avoid these, take your time during inspections, use checklists, involve workers in discussions, and keep communication clear and ongoing.
Practical Example: Construction Site
Think about a construction site. Hazards could be working at height, heavy vehicles, noise, and dust. You’d list them all, then identify who’s most at risk—like crane operators, labourers, or visitors.
You would check how bad and likely each risk is, such as falling or inhaling dust. Controls could include guardrails, traffic barriers, regular equipment checks, and using dust masks. Keeping these controls recorded and training your team helps keep everyone safe.
Learn More With a Free Course
If you want to practise these five steps with guided examples and quizzes, check out the Risk Assessment Certificate Course at EduCourse. It’s free and designed for South Africans wanting to improve workplace safety skills and get a certificate.